Hi All,
Here’s how I built a LokiJS database with LocalForage for persistent storage. All feedback is welcomed.
My Requirements / App Wish List
- a no-SQL database
- long-term data persistence
- simple, legible code and as few adapters as possible
- platform agnostic
That 4th point is the kicker. That knocks out IndexedDB and the like. For more details, see CanIUse.Com. I began writing for PouchDB but found that it was far too slow, and saving the database to a server was much more burdensome than their streamlined tutorials show. I also wanted more granular control of its cloud sync process.
The main reasons I opted for LokiJS
- simple, familiar JavaScript objects
- good documentation on lokijs.org
- in-memory architecture
- ability to store full DB as a JSON token (awesome for small DBs!)
- microscopic footprint
The main reasons for writing this tutorial
- LokiJS and LocalForage are great tools
- I’m yet to find an Ionic-centric tutorial on them online
- I need to improve my TypeScript, so this is a good exercise for myself
So let’s begin…!
My Environment
June 22, 2016 Cordova CLI: 6.1.1 Ionic Framework Version: 2.0.0-beta.9 Ionic CLI Version: 2.0.0-beta.25 Ionic App Lib Version: 2.0.0-beta.15 ios-deploy version: 1.8.6 ios-sim version: 5.0.8 OS: Mac OS X El Capitan Node Version: v5.7.1 Xcode version: Xcode 7.3 Build version 7D175
Generating the skeleton code
In your terminal, type the commands…
ionic start LokiDB blank --v2
cd LokiDB
ionic platform add ios
ionic platform add android
npm install lokijs
npm install localforage
All of our code will be modified in app > pages > home > home.html and home.ts.
Coding Strategy
- add LokiJS without persistence
- add interactive elements to our LokiJS database
- add LocalForage to gain persistence
Adding LokiJS without persistence
-
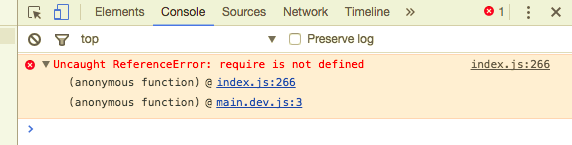
In home.ts, just under the
importstatements, adddeclare var require: any;
var loki = require(‘lokijs’);
-
Inside the HomePage class, we need to declare 2 objects: one for our database and one for its collection of documents
db: any; // LokiJS database robots: any; // our DB's document collection object -
Let’s set up these objects inside the constructor
this.db = new loki('robotsOnTV'); this.robots = this.db.addCollection('robots'); -
Next, we’ll insert a few documents (for those who aren’t used to no-SQL databases … me included… a document is just an object held by the database). We’re using JSON style insertion because that’s how LokiJS receives the data. Don’t worry about making TypeScript interfaces; that will only add to code we’d need to write.
this.robots.insert({ name: 'Bender', tvShow: 'Futurama' }); this.robots.insert({ name: 'Rosie', tvShow: 'The Jetsons' }); this.robots.insert({ name: 'K1', tvShow: 'Dr. Who' }); -
The final thing to do in the TS file is to add a helper function. We want the HTML file to display these results, but
*ngForwill not iterate over custom data types, so we’re going to write a simple, generic object-to-Array function:convert2Array(val) { return Array.from(val); }
This is how your home.ts should look:
import {Component} from "@angular/core";
import {NavController} from 'ionic-angular';
declare var require: any;
var loki = require('lokijs');
@Component({
templateUrl: 'build/pages/home/home.html'
})
export class HomePage {
db: any; // LokiJS database
robots: any; // our DB's document collection object
constructor(private navController: NavController) {
this.db = new loki('robotsOnTV');
this.robots = this.db.addCollection('robots');
this.robots.insert({ name: 'Bender', tvShow: 'Futurama' });
this.robots.insert({ name: 'Rosie', tvShow: 'The Jetsons' });
this.robots.insert({ name: 'K1', tvShow: 'Dr. Who' });
}
  convert2Array(val) {
      return Array.from(val);
  }
}
-
Lastly, let’s get the HTML ready. Delete everything inside the
<ion-content>tag of home.html, and replace it with this:<!-- list all database elements --> <ion-card *ngFor="let robot of convert2Array(robots.data)"> <ion-card-header> {{robot.name}} </ion-card-header> <ion-card-content> {{robot.tvShow}} </ion-card-content> </ion-card>
Adding interactive elements to our LokiJS database
-
Inside home.ts, add 2 variables for user input
robotName: string;
robotTVShow: string;
-
We’ll add in support to insert and delete from the database as well:
addDocument() { if (!this.robotName || !this.robotTVShow) { console.log("field is blank..."); return; } this.robots.insert({ name: this.robotName, tvShow: this.robotTVShow }); // LokiJS is one's-based, so the final element is at <length>, not <length - 1> console.log("inserted document: " + this.robots.get(length)); console.log("robots.data.length: " + this.robots.data.length); } deleteDocument($event, robot) { console.log("robot to delete: name = " + robot.name + ", TV show = ", robot.tvShow); // $loki is the document's index in the collection console.log("targeting document at collection index: " + robot.$loki); this.robots.remove(robot.$loki); } -
Let’s add one more card to home.html
<!-- add items to LokiJS database --> <ion-card> <ion-card-content> <ion-list> <ion-item> <ion-label floating>Robot Name</ion-label> <ion-input clearInput [(ngModel)]="robotName"></ion-input> </ion-item> <ion-item> <ion-label floating>Which TV Show?</ion-label> <ion-input type="text" [(ngModel)]="robotTVShow"></ion-input> </ion-item> </ion-list> </ion-card-content> <ion-card-content> <button (click)="addDocument()">Add</button> </ion-card-content> </ion-card> -
Finally, we need to allow for document deletion, so let’s change the original card so we have a Delete button:
  <!-- list all database elements -->
  <ion-card *ngFor="let robot of convert2Array(robots.data)">
      <ion-card-header>
          {{robot.name}}
      </ion-card-header>
      <ion-card-content>
          {{robot.tvShow}}
          <button (click)="deleteDocument($event, robot)">Delete</button>
          <button (click)="saveAll()">Save All</button>
          <button (click)="importAll()">Import All</button>
      </ion-card-content>
  </ion-card>
Long-term Storage
Ready for the last part? Let’s go!
We’re going to allow for saving to file and importing from that file. For more info on how LocalForage prioritizes storage, see http://mozilla.github.io/localForage/
-
home.ts needs a localForage object. Add this just below your ‘var loki…’ code:
var localforage = require(‘localforage’);
-
Add in functions for saving the database and retrieving it. LocalForage uses key-value maps, and since we’re only interested in saving 1 value (the entire database), we’ll hard-code our key as
storeKey.saveAll() { localforage.setItem('storeKey', JSON.stringify(this.db)).then(function (value) { console.log('database successfully saved'); }).catch(function(err) { console.log('error while saving: ' + err); }); } importAll() { var self = this; localforage.getItem('storeKey').then(function(value) { console.log('the full database has been retrieved'); self.db.loadJSON(value); self.robots = self.db.getCollection('robots'); // slight hack! we're manually reconnecting the collection variable }).catch(function(err) { console.log('error importing database: ' + err); }); } -
In home.html, we’re going to hook up the new storage functions to 2 new buttons. Next to our “Add” button, include these:
          <button (click)="saveAll()">Save All</button>
          <button (click)="importAll()">Import All</button>
That’s all it takes to build a persistent, no-SQL database in Ionic 2!
Thanks for reading,
Ryan Logsdon